Showing posts with label Web-Metrics. Show all posts

How to create thank you page confirmation tracking


Create an eCommerce Tracking Pixel for your Confirmation  Page using Google Tag Manager Account

To follow these instructions, you will need to know your confirmation page URL to create the tracking code. The sample used is "example.com/thank-you.html."

STEP 1: Create a new tag in Google Tag Manager.
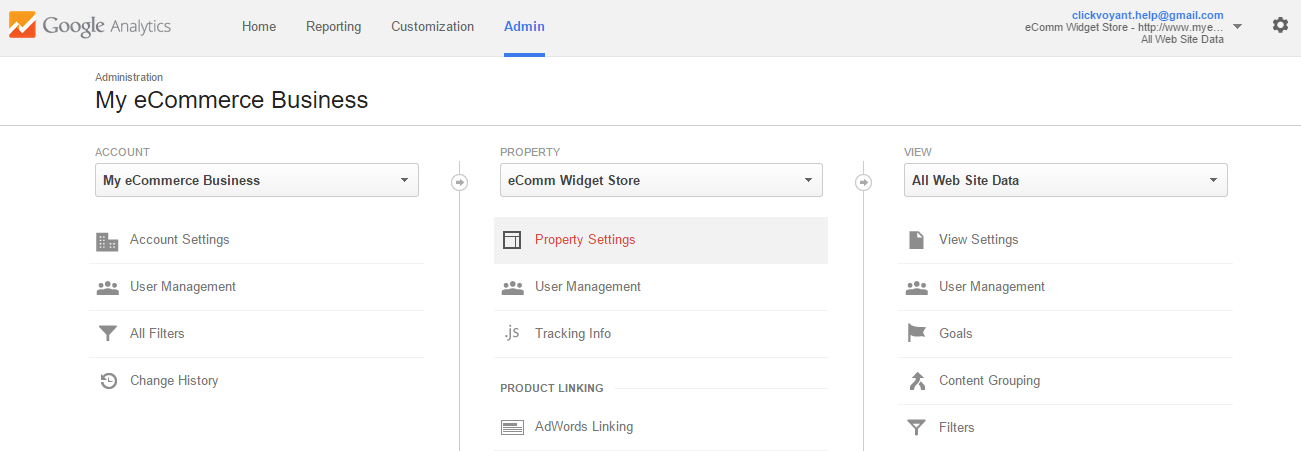
Log in to Google Tag Manager and click on the appropriate account, as with the other examples in this blog we are using "My eCommerce Business."

Google Tag Manager Account

Next click on the appropriate Container. For this example, we are using the fictitious "eComm Widget Store."

eComm Widget Store

Make sure you are in Container Draft and click on "New."

Container Draft Google Analytics

Next select "Tag."

select Tag eCommerce GA

You will now have to give the new tag a name. Call it something like “Transaction Sale.”
Transaction Sale Google Aanalytics

STEP 2: Select the type of tag. 
Since this is for the confirmation page and it is for eCommerce Analytics, you will have to start with Google Analytics and then choose Universal Analytics.
confirmation page for eComm Analytics


Now enter your Google Analytics Tracking ID which you received when you first set-up analytics. This Tracking ID is needed so that you can connect sales and revenue from your website with the incoming traffic and on-site visitor performance.
Google Analytics Tracking ID
Next select the Tag function by selecting the “Track Type.” In this case it is for a transaction or order.
Tag performance - Track Type


STEP 3: Set where and how the new tag "fires."
You will now have to configure when the tag fires. Please select “Firing Rules.”

Firing Rules Google Analytics

You will have to create a new rule for when the tag needs to fire. Please click on the radio check-mark for “Create new rule.”
Google Analytics Create new rule

Now name the rule something that is descriptive of the firing behavior of the tag. We will call this rule “Order Confirmation Page.”

name the rule in Google Analytics

Next, you will have to write a rule for when the tag needs to fire. Since this is for the confirmation page, select the URL from the drop down that contains only the root URI  for the "contains" parameter logic. Basically, the URL for the the page in your final step in the buying process. Check with your IT or Developer to find out what the confirmation page is called.

For this example we will assume the confirmation page contains the URI "thank-you.html" (this is only an assumption for explanation purposes ONLY, you will need to check with your IT or Developer for that actual page root URI. A note: most times the base URI is followed by query strings. Only use the root URI for the "contains" logic).

URI thank-you.html

You now have the tag named, the tag type, the tracking ID for the Google Analytics property, the track type and when it should fire. You are almost there. You just need to click “Save” if everything is in order.

Once you select “Save” you will be able to see all of the tags you have created. At this point there should only be two tags: Google Analytics (for site wide traffic) and the Transaction Sale tag we just created for tracking confirmation page and sales or orders. 

You are ready to create the instance of the two tags within the container. Please click the “Create Version” button.
Transaction Sale tag

STEP 4: Publish your new Tags!
Click on “Publish.”
Scnt5%20-%20o.png

Once you click on “Publish” you will have to confirm. Click “Publish” again.
publish tag GA eCommerce
Congratulations! Your new eCommerce tracking pixel is now live and ready to collect transaction data.


Need more help setting this up? We'll walk you through next steps for setting up your eCommerce analytics, schedule a free half hour appointment.

Let us take care of your ecommerce implementation

32 Google Analytics Must Have's for Best in Class eCommerce Stores

Best in Class eCommerce Analytics Data Integration Checklist:

In today’s business, whether your primary business is eCommerce or not, you have to have a website. You know this, so you’ve gone through all the right steps to make sure your customers can find you online, you have a nice landing page, a call to action, you are posting on social media, and maybe even doing some advertising. Now what?

If you don’t have analytics set up on your site with best practices, you may be wasting your time and money. How can you improve your business if you don’t know what your customers are doing? Where are they coming from? What are they looking at? What are they not looking at? What should you do about it tomorrow? Analytics is the key to understanding your customers’ past, present and future. 

Just like when you start a brick-and-mortar store, you want to make sure you cover all of your bases. You check the shelves, you talk to customers, you get feedback from employees. If you have a store, and someone asks an employee where something is, you want them to be able to find it right? The difference is, if you don’t have your site search set up, someone can easily just click out of your store, and unfortunately it is that easy to lose a customer in the digital space. Setting up your store is where we come in. Analytics helps you check your digital shelves. Analytics shows you what you customers want. Analytics helps you decide how to advertise more effectively. Following this roadmap ensures your store will be up and running with the best analytics practices in place. We will be your guide and take you to from beginning to end. 

Ready?

  1. ОGoogle Tag Manager
  2. ОGoogle Analytics: Universal Analytics
  3. ОEnhanced eCommerce and Confirmation Page Pixels
  4. ОWebmasters - Google (SEO)
  5. ОBing - Webmasters Tools (SEO)
  6. ОGoogle AdWords (Google Search PPC)
  7. ОBing Ads (Yahoo & Bing Search PPC)
  8. ОSite Search Optimization
  9. ОInbound Link Campaign Tracking UTM Tags
  10. ОSocial Media Tracking in Analytics
  11. ОUpload Marketing Costs in Analytics
  12. ОBot-blocking in Analytics
  13. ОVisitor Demographics & Interest Reports in Analytics
  14. ОGoogle Content Experiments (Site Optimization A/B Testing)
  15. ОLink Share URL Shortener Analytics
  16. ОWebsite Likes and Product Page Sharing
  17. ОOn-site Event Tracking in Google Analytics
  18. ОCustom Dimensions in Google Analytics
  19. ОCustom Metrics in Google Analytics
  20. ОConversion Tracking (Confirmation Page or Events)
  21. ОProduct / Cart Abandon Remarketing
  22. ОOn-site Content Grouping in Google Analytics
  23. ОMarketing Channel Settings in Google Analytics
  24. ОConversion Attribution Model in Google Analytics
  25. ОAdvanced data Segmentation in Google Analytics
  26. ОCustom Alerts in Google Analytics
  27. ОTraffic and Site impact Annotations in Google Analytics
  28. ОWebsite Speed Tracking
  29. ОGoogle Real-Time Website Analytics
  30. ОThink with Google (online marketing insights)
  31. ОGoogle Trends (keyword based market research)
  32. ОMobile Website Responsive Design

How to configure Google Webmaster Tools


Google Webmaster Tools Configuration

Having a Google Webmaster account is an essential component of conducting business online. Regardless of your website and the eCommerce vertical you compete in, a large portion of your traffic is derived from search engine traffic -- particularly free search traffic from Google. Only through Google Webmaster Tools can you completely monitor and communicate your website’s status and crawlability with Google as well as track your keyword ranking in Google’s search results. (As a side note: this type of data is also available through Bing.com, the Microsoft Search Engine, but this data cannot be piped into Google Analytics).


Sctn5-a.png

Setting up and configuring Google Webmaster Tools is the easiest configuration reviewed in this Whitepaper. You will need to create a Google Webmaster account in order to view the proprietary search data relating to your website and then link this account with both Analytics and Tag Manager. If you do not have an account already, navigate to www.google.com/webmasters/ and sign in with the Gmail address to which both Google Tag Manger and Google Analytics are associated with.

Sctn5-b.png
Once you sign into Webmaster Tools, you are ready to create your account. Navigate to Home and chose to “Add A Site”

Sctn5-c.png

Add your eComm website URL, for this example we are using the ficticious www.myecommwebsite.com you are now ready to validate the site ownership status.

Recommended Verification
There are several ways in which to “verify” and prove your site ownership.
If you have already implemented Google Tag Manager, Clickvoyant recommends that you validate and verify site ownership through GTM. This is the easiest method out of the five possibilities. All you have to do is select “Verify” and then log into GTM, this will prove that you have the capability to place code on your site. This again goes to show how indispensable and agile having Google Tag Manager can be for the eCommerce site owner. Through one initial on-site implementation you gain the ability to add additional tools and capabilities.

Sctn5-ee.png

Alternate Verification Methods
The HTML will require IT / Developer to implement. This is the most rigorous verification method. It is achieved by creating an empty .html file on your site, with a specific Google Webmaster key code. Once created and posted onto your website, select to “Verify” the key code and site ownership.
Sctn5-d.png

Sctn5-e.png

If you do not wish to create an empty key code file or your Content Management System will not easily allow it, there are several other methods through which you can verify and prove your site ownership. The three other methods are by adding: an HTML Meta Tag to the header of your homepage (a meta tag only visible to Google, which does not interfere with site layout or performance), through your Domain Name provider, or by accessing Google Analytics code that is already live on your site

Sctn5-f.png
Success. You now have access to your own Google-side SEO search data. The next step is to connect this data into your Google Analytics implementation. Piping this off-site search data into GA will give you the ability to see off-site SEO impressions, keyword ranking and click-through rates along your site traffic and key performance indicators. Remain logged into Google Webmaster and open a new tab on your browser. Navigate to Google Analytics and log in. Once signed in click on “Admin” on the top navigation bar. Select “Property Settings” under the appropriate Property, in this scenario we are using the “eComm Widget Store” property we created earlier for Google Analytics.

Sctn5-g.png

Scroll toward the bottom of the page, past the other Property configuration settings and select “Edit” under “Webmaster Tools Settings.”
Sctn5-h.png
This will enable Webmaster Tools to pass data into Google Analytics. Select the site URL for your web property and click “Save”.

Sctn5-i.png

Google will ask you to verify this data association. Click “OK”.

Sctn5-j.png

Sctn5-k.png

Once you click “Save” -- Google Webmaster tools data is now live and being piped into Google Analytics.

Congratulations!

You have just opened wide a view into your site’s SEO Keyword ranking as well as the ability to correlate SEO impressions, click-throughs and product page ranking opportunities while measuring the impact of free search engine traffic on revenue.


Need help setting up your eCommerce Analytics? We'll walk you through it! Schedule a free half hour appointment.

How to integrate Google AdWords PPC data into Google Analytics

View Google AdWords Paid Search Data in Google Analytics


Most eComm websites rely on PPC or Paid Search for traffic and a significant portion of revenue. If your business derives traffic from Google Paid Search, known as AdWords, you need to link off-site paid search data with your analytics account. 


Google AdWords PPC Data Link

Why Pass PPC Data?

There is a plethora of data within your AdWords PPC account that will be extremely useful once paired with your onsite behavioral data. You will be able to see which keywords and ad groups are converting (leading to sales), have the best onsite performance (time on site and product views), as well as compare the cost per click or visit.

STEP 1: Start the Account Link Process
Connecting the data sets is very easy and does not require IT or a Developer support. However, the Gmail or Google Account you use for Analytics needs to be the same as your AdWords account. If it isn’t you need to make sure that you change your AdWords login to reflect your Analytics Account.

Log into your AdWords account, and in another browser tab, log into your Google Analytics account. Then click on “Admin.”

From here, make sure you have the correct Account and Property selected from the drop down menus. Then click on "AdWords Linking" to start the connection process between your Google PPC and Google Analytics accounts.

Sctn%208%20-%20b.png

adwords and GA Account Link Process

STEP 2: Confirm the Correct PPC Account is Selected
Because you signed into your AdWords account first and then logged into Google Analytics, your PPC Account will be automatically identified. If you have multiple AdWords PPC Accounts, make sure the correct account is the one that is selected (checked). Click on “Continue.”


Confirm the correct PPC Account

STEP 3: Link your Account to the Property View
You will now have to configure this connection. Name the configuration so that you can later remember the accounts that are linked. Be as descriptive as possible to keep your connections organized. 

For this example we are using the same connection we have used for the other marketing tools. Calling this “My eComm Website”. If you have multiple Google Analytics property views, you will have to select the appropriate view to connect with Google AdWords (you can select more than one view if you do have multiple views). Once you click the checkbox the "Linked view(s)" drop down will indicate how many property views you are going to link to this AdWords Account. 

Once you have selected the appropriate views, click “Link accounts” to complete the configuration.

configure adwords link group

STEP 4: Complete the Account Link Link
You will be notified that there is a waiting period until the connection is complete and data will start to be piped in. At this point you can click on “Done” and log out of both Google Analytics and AdWords. Check back in 24 hrs to see if data is starting to pass through.

PPC data and Google Analytics

How to integrate Google AdWords PPC data into Google Analytics

View Google AdWords Paid Search Data in Google Analytics


Most eComm websites rely on PPC or Paid Search for traffic and a significant portion of revenue. If your business derives traffic from Google Paid Search, known as AdWords, you need to link off-site paid search data with your analytics account. 


Google AdWords PPC Data Link

Why Pass PPC Data?

“What is the use of running if we are not on the right path”
- German Proverb

There is a plethora of data within your AdWords PPC account that will be extremely useful once paired with your onsite behavioral data. You will be able to see which keywords and ad groups are converting (leading to sales), have the best onsite performance (time on site and product views), as well as compare the cost per click or visit.

STEP 1: Start the Account Link Process
Connecting the data sets is very easy and does not require IT or a Developer support. However, the Gmail or Google Account you use for Analytics needs to be the same as your AdWords account. If it isn’t you need to make sure that you change your AdWords login to reflect your Analytics Account.

Log into your AdWords account, and in another browser tab, log into your Google Analytics account. Then click on “Admin.”

From here, make sure you have the correct Account and Property selected from the drop down menus. Then click on "AdWords Linking" to start the connection process between your Google PPC and Google Analytics accounts.

Sctn%208%20-%20b.png

adwords and GA Account Link Process

STEP 2: Confirm the Correct PPC Account is Selected
Because you signed into your AdWords account first and then logged into Google Analytics, your PPC Account will be automatically identified. If you have multiple AdWords PPC Accounts, make sure the correct account is the one that is selected (checked). Click on “Continue.”


Confirm the correct PPC Account

STEP 3: Link your Account to the Property View
You will now have to configure this connection. Name the configuration so that you can later remember the accounts that are linked. Be as descriptive as possible to keep your connections organized. 

For this example we are using the same connection we have used for the other marketing tools. Calling this “My eComm Website”. If you have multiple Google Analytics property views, you will have to select the appropriate view to connect with Google AdWords (you can select more than one view if you do have multiple views). Once you click the checkbox the "Linked view(s)" drop down will indicate how many property views you are going to link to this AdWords Account. 

Once you have selected the appropriate views, click “Link accounts” to complete the configuration.

configure adwords link group

STEP 4: Complete the Account Link Link
You will be notified that there is a waiting period until the connection is complete and data will start to be piped in. At this point you can click on “Done” and log out of both Google Analytics and AdWords. Check back in 24 hrs to see if data is starting to pass through.

PPC data and Google Analytics